Dealer Scope
- view dealer fleet devices
- use Fleet Console and Fleet Map
- manage eligible devices
- deploy `my_fleet` rollouts
- issue tokens within dealer scope
- push global firmware
- manage devices outside dealer scope
- issue tokens outside dealer scope
- use admin-only override actions
Fleet Console
Fleet Console is the main daily operations page. Use it to search by device ID, customer email, or device name, confirm connection state, review firmware version, and open the single-device Manage page.
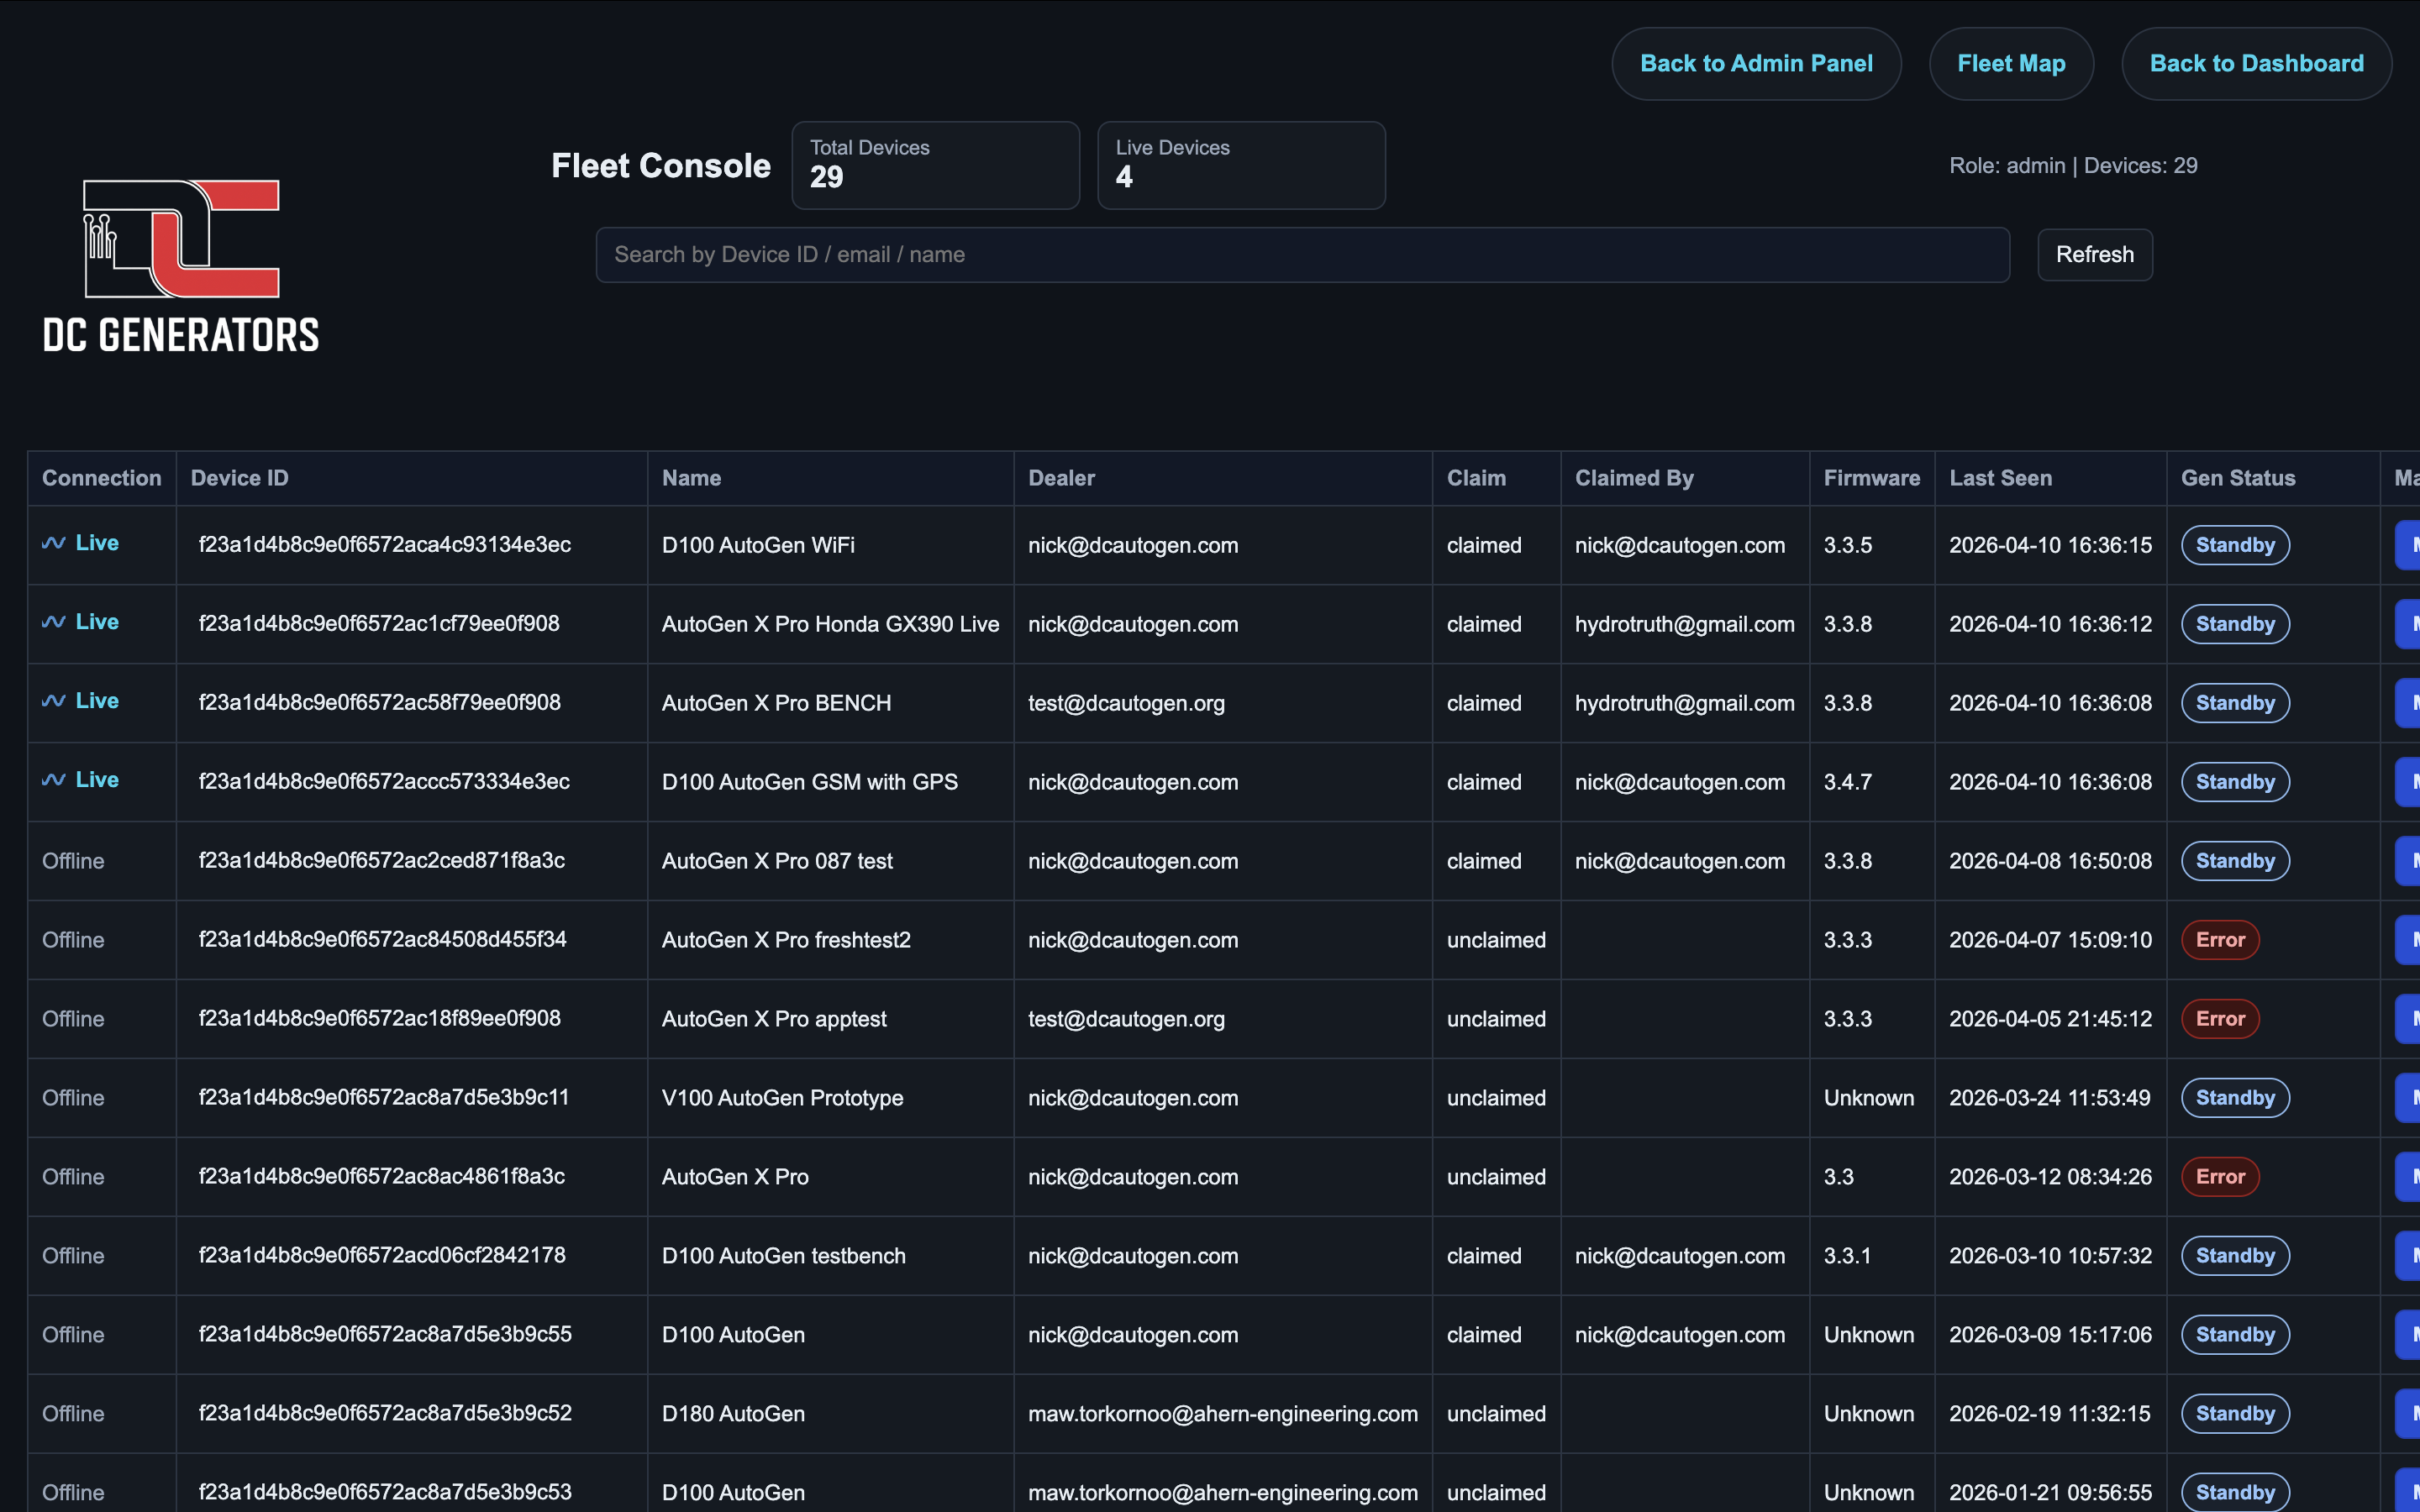
- Use search to filter by device ID, customer email, or device name.
- Use the
Managebutton to open the selected device. - Confirm firmware versions after OTA or staged rollout.
- Check live and offline state before taking action.
Fleet Map
Fleet Map is intended for GPS-enabled devices. Use it to inspect recent position or last known location for dealer-scoped field units.
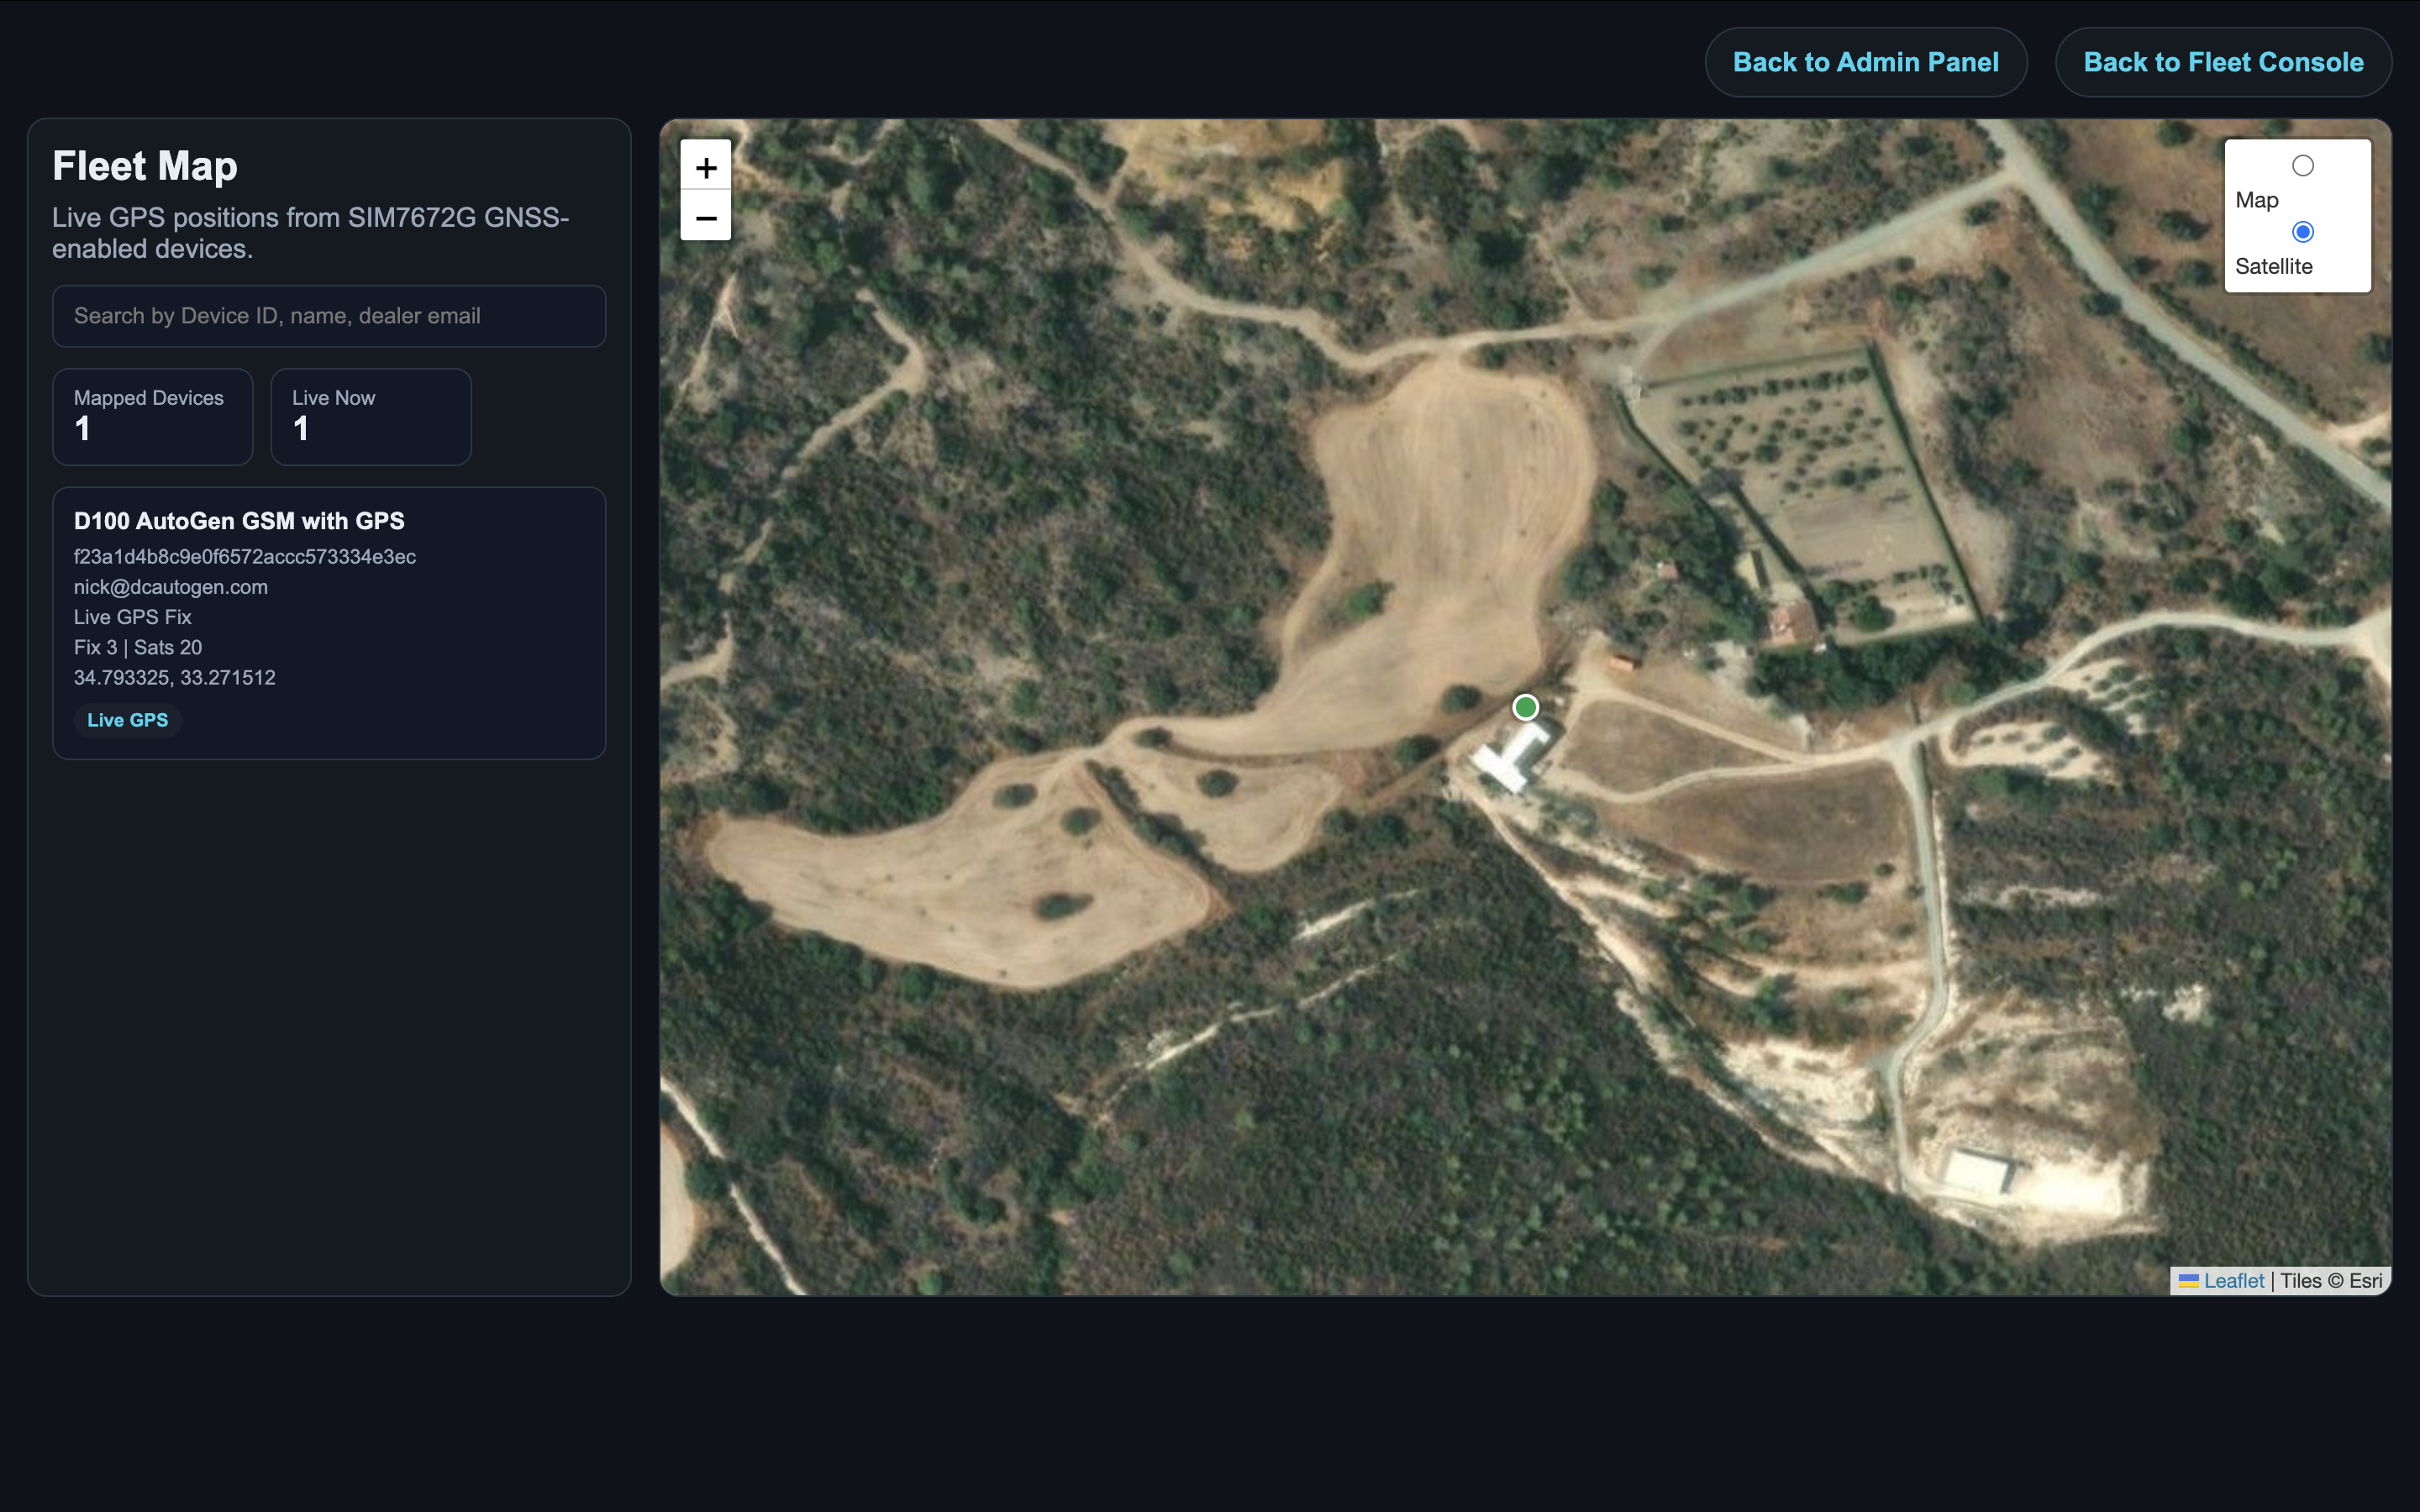
- Use the map to understand geographic distribution of your fleet.
- Red markers highlight units that need attention or lost contact.
- Green markers highlight units that are reporting normally.
Device Manage Page
The Manage page gives you single-device actions such as Start, Stop, Reboot, FW Update, and Force OTA. Use it for targeted actions and for post-rollout validation on one device.
FW Update: normal remote update actionForce OTA: immediate OTA attempt when neededReboot: use carefully on remote units
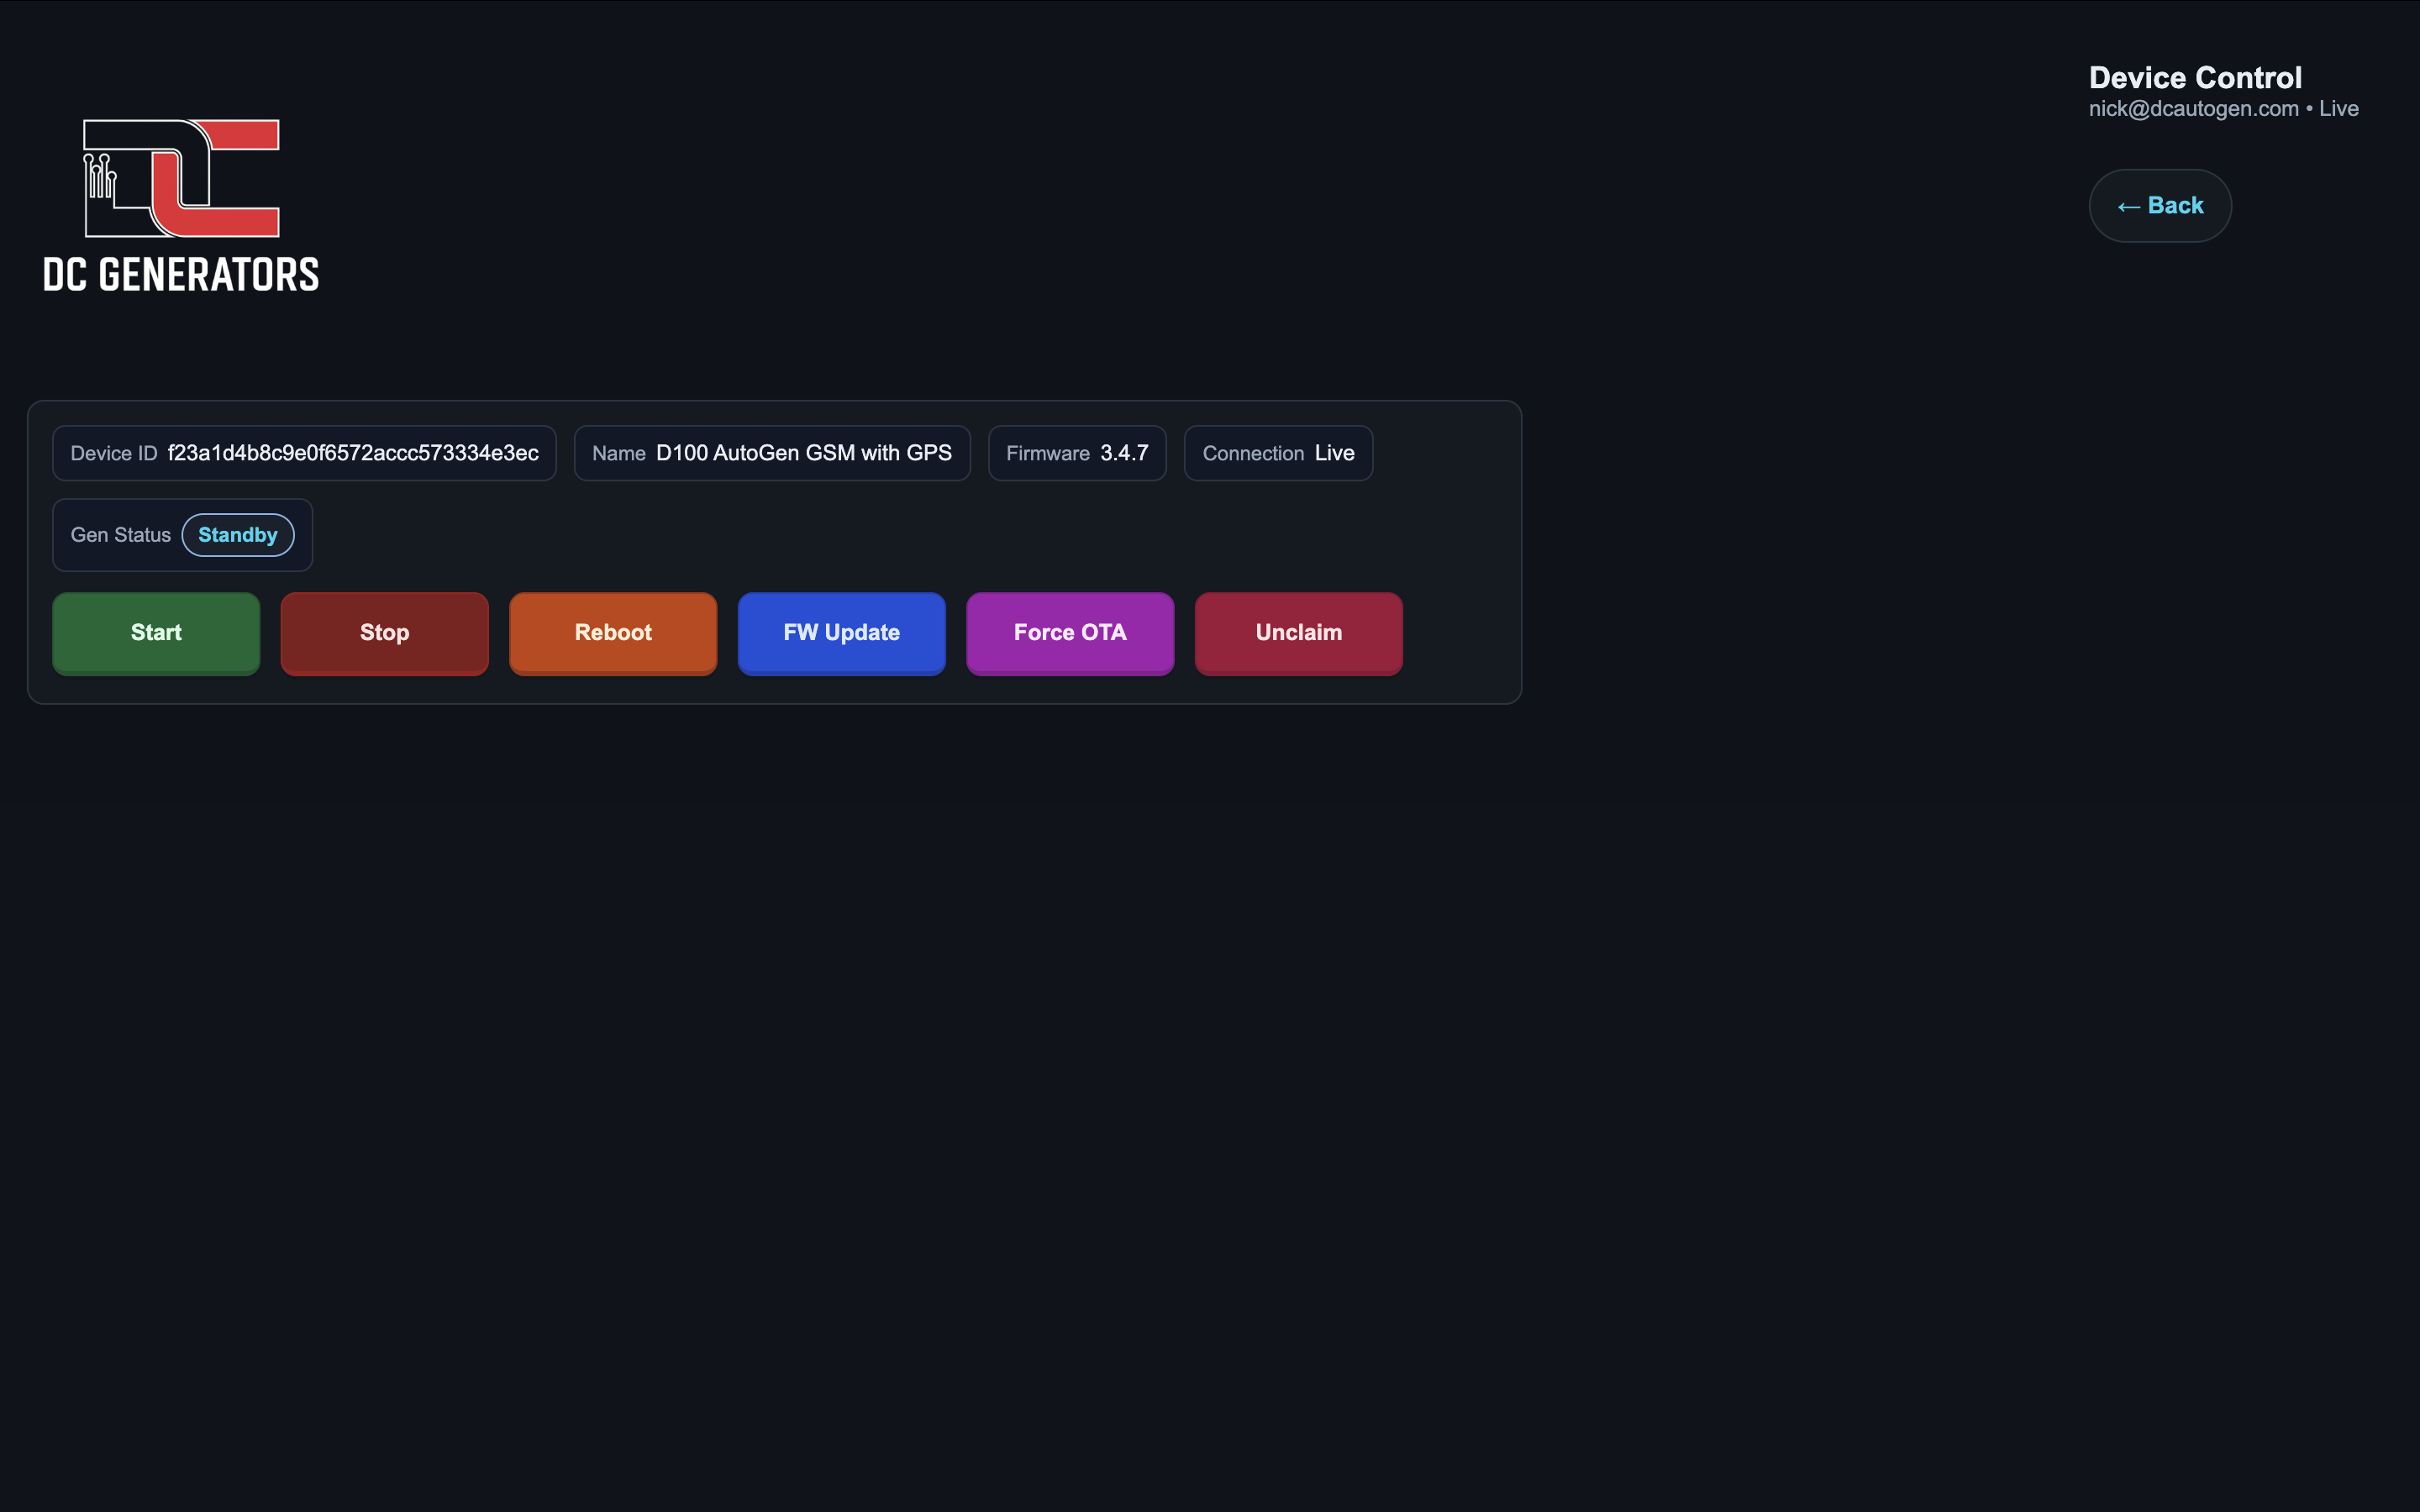
- Status fields confirm you are acting on the correct device.
- Start and Stop send live commands to the selected unit.
- Firmware actions are grouped for update checks and recovery.
Diagnostics
Diagnostics are available from the single-device Manage page for AutoGen Ultra and AutoGen DC Generator devices. Open the device, select the Diagnostics tab, and use the event stream to understand why a unit started, stopped, failed to start, entered a fault, or reported a service condition.
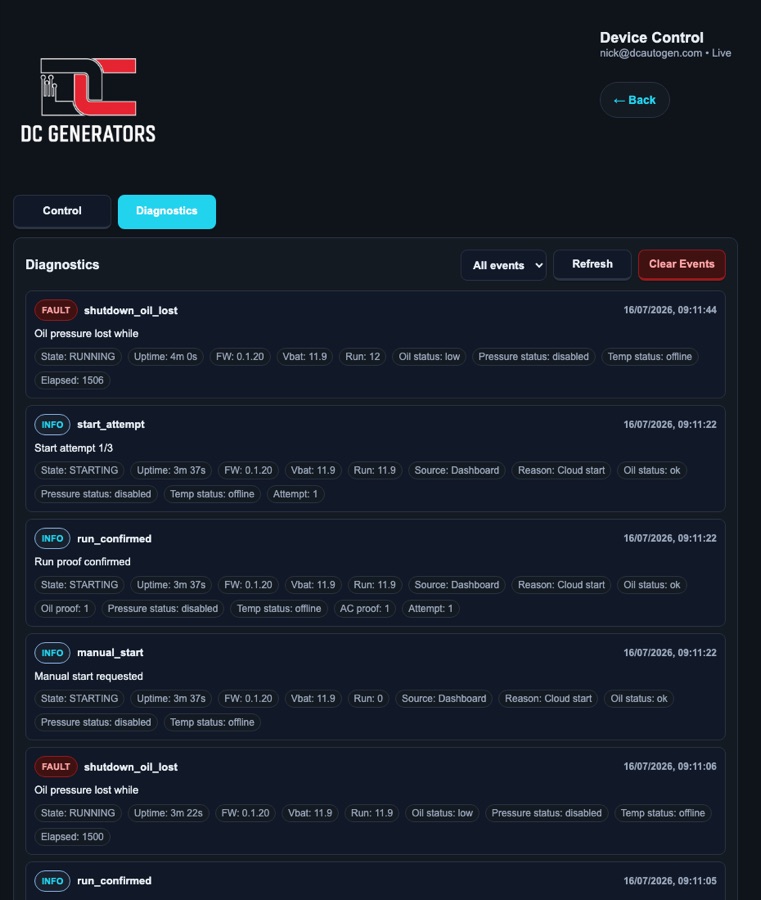
All events,Faults,Warnings,Info, andDebugfiltersRefreshreloads the latest device eventsClear Eventsremoves the stored diagnostics for that device- The open Diagnostics tab refreshes automatically about every 5 seconds
- Dealer users can view diagnostics only for devices inside dealer scope
- Events are requested by email and device ID through
fleet_device_diagnostics_api.php - The API returns up to 500 events; the Manage page requests the latest 150
- Diagnostics are stored server-side and are not broadcast to legacy mobile app parsers
Event Information
Each diagnostic event includes event type, severity, message, controller state, state code, firmware version, uptime, created time, and a compact snapshot from the controller at the moment the event was emitted.
manual_start, manual_stop, reset, boot_recovery, service_lock, shutdown_high_temp, start_attempt, run_confirmed, start_attempt_failed, startup_failed, shutdown_oil_lost, shutdown_run_signal_lost, and shutdown_high_battery.
info is normal operational history, warn needs attention or explains a requested stop/retry, fault identifies shutdowns or failed starts, and debug is reserved for deeper investigation.
Snapshot Fields
st/sc state name/code, up uptime in ms, fw firmware, src start source, why start reason, a attempt number, and elapsed elapsed ms for failed or shutdown timing.
vb battery voltage, rs run-signal reading, rm run proof mode, cur charge current, ac/op AC and oil proof flags, plus ar/af/th raw/filtered run signal and threshold when run proof is lost.
oil oil sensing enabled, ok oil OK, os oil status, ob oil pressure bar, ts temperature status, and et/at/nt engine, alternator, and environment temperatures when fresh.
ps pressure status, pv pressure sensor voltage, and pb pressure bar are shown when pressure control is enabled and values are valid.
Firmware Rollouts
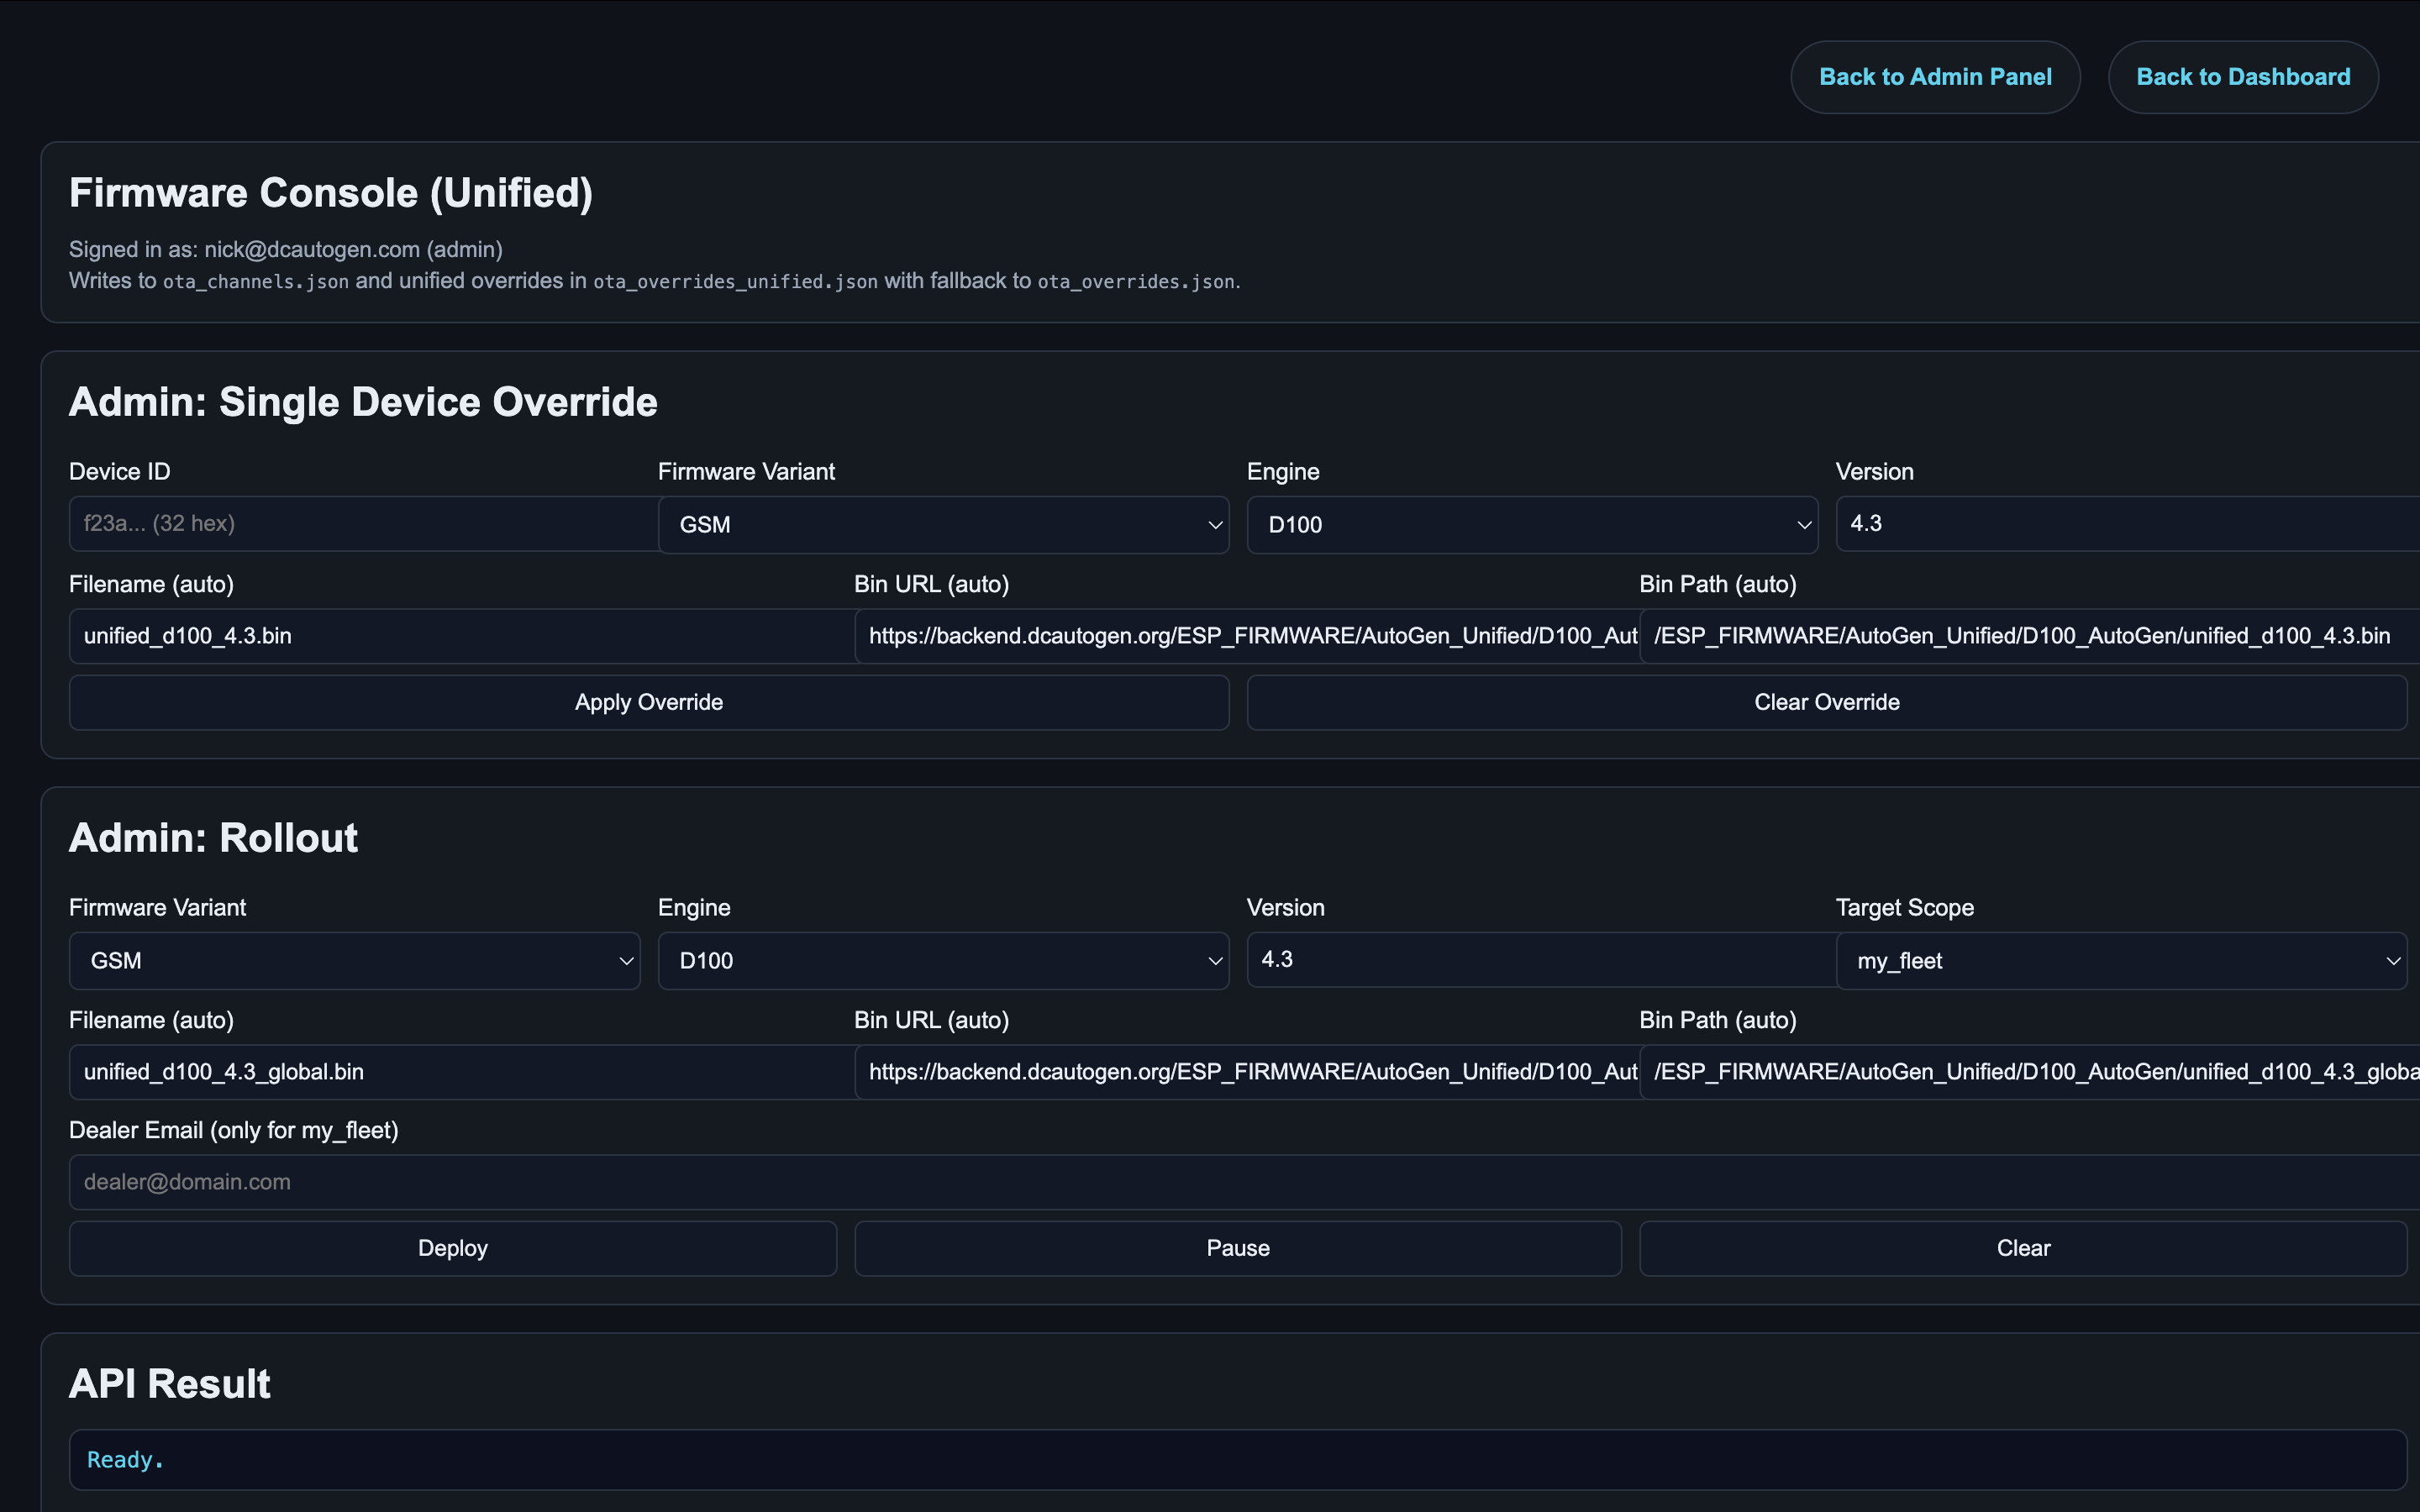
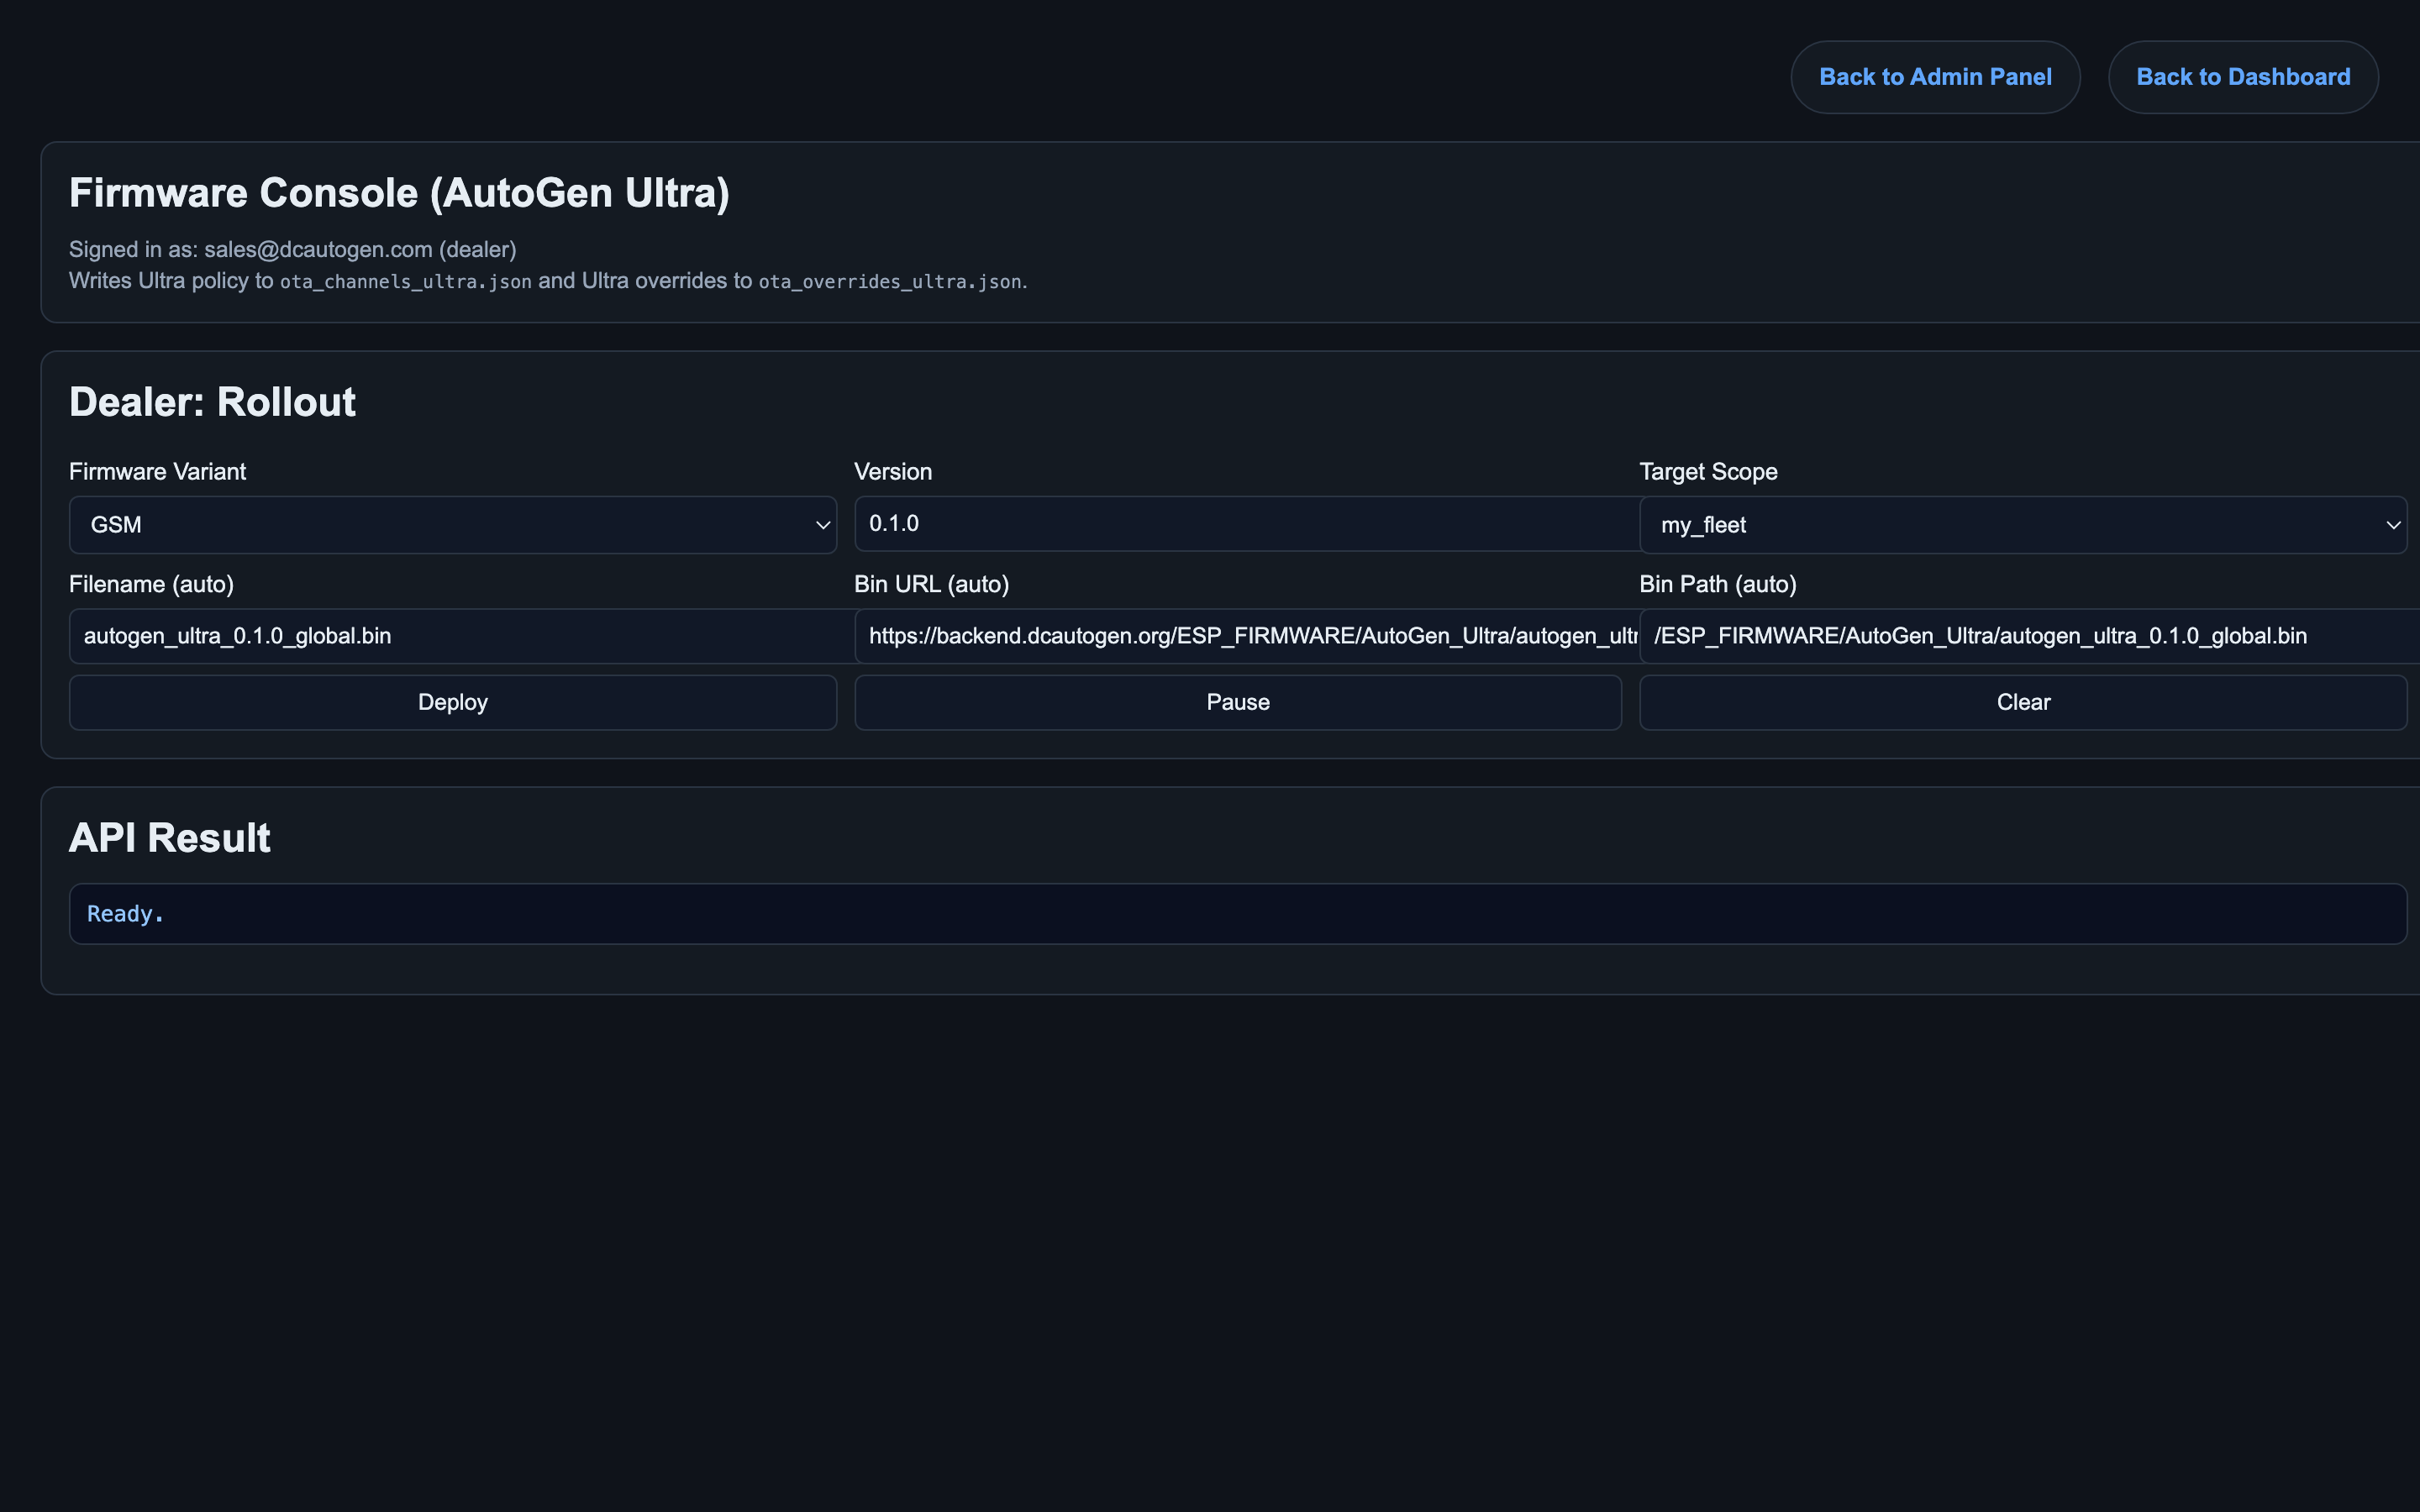
Dealers use rollout sections only, not admin override sections. For X Pro, use the X Pro firmware console. For D100, D180, V100, and V5, use the Unified firmware console. For AutoGen Ultra, use the dedicated Ultra firmware console and confirm the correct GSM or WiFi variant before deployment.
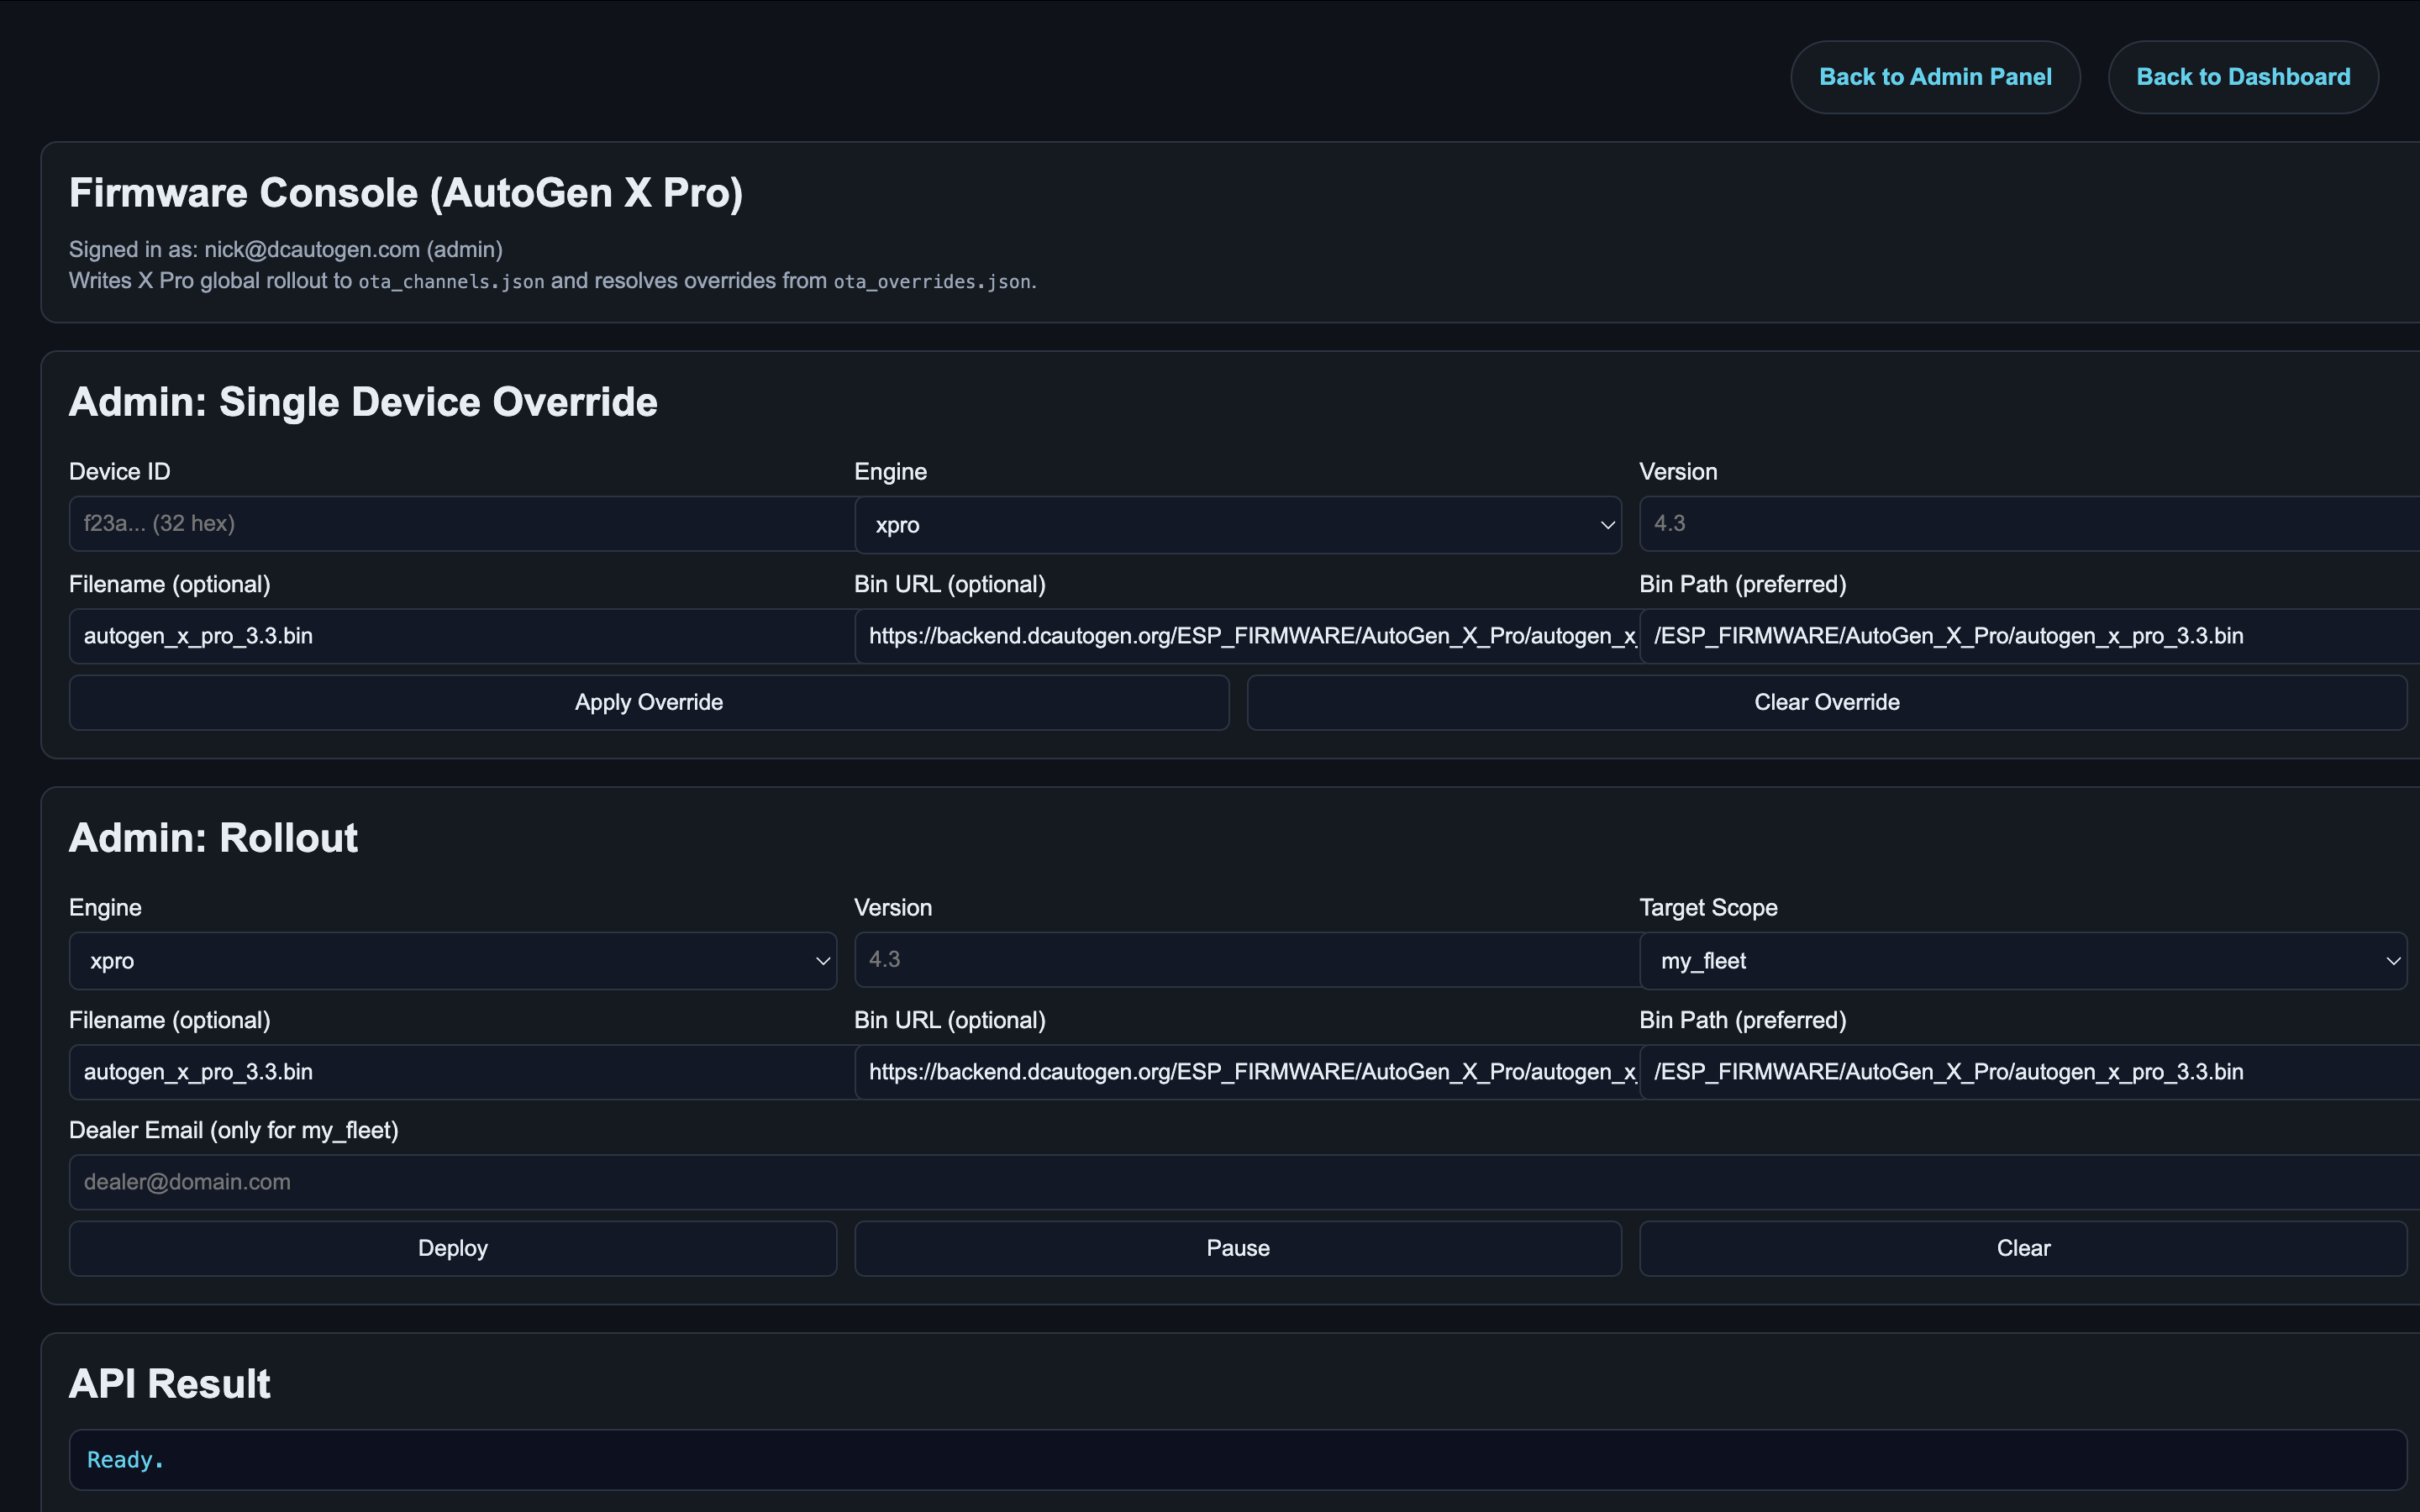
Use rollout actions for dealer fleet X Pro devices.
Choose the correct engine and transport variant before deploying.
Choose the correct transport variant and use the Ultra-only console so Ultra releases do not share policy with Unified engines.
Safe OTA Procedure
- Validate the firmware on a test device first.
- Select the correct console, engine, and variant.
- Deploy to
my_fleet. - Monitor Fleet Console until devices return online.
- Confirm reported firmware versions changed correctly.
API Tokens
Use the API Tokens page to issue read-only or control-enabled bearer tokens within dealer scope. Restrict tokens to specific devices when running demos, pilots, or narrow integrations.
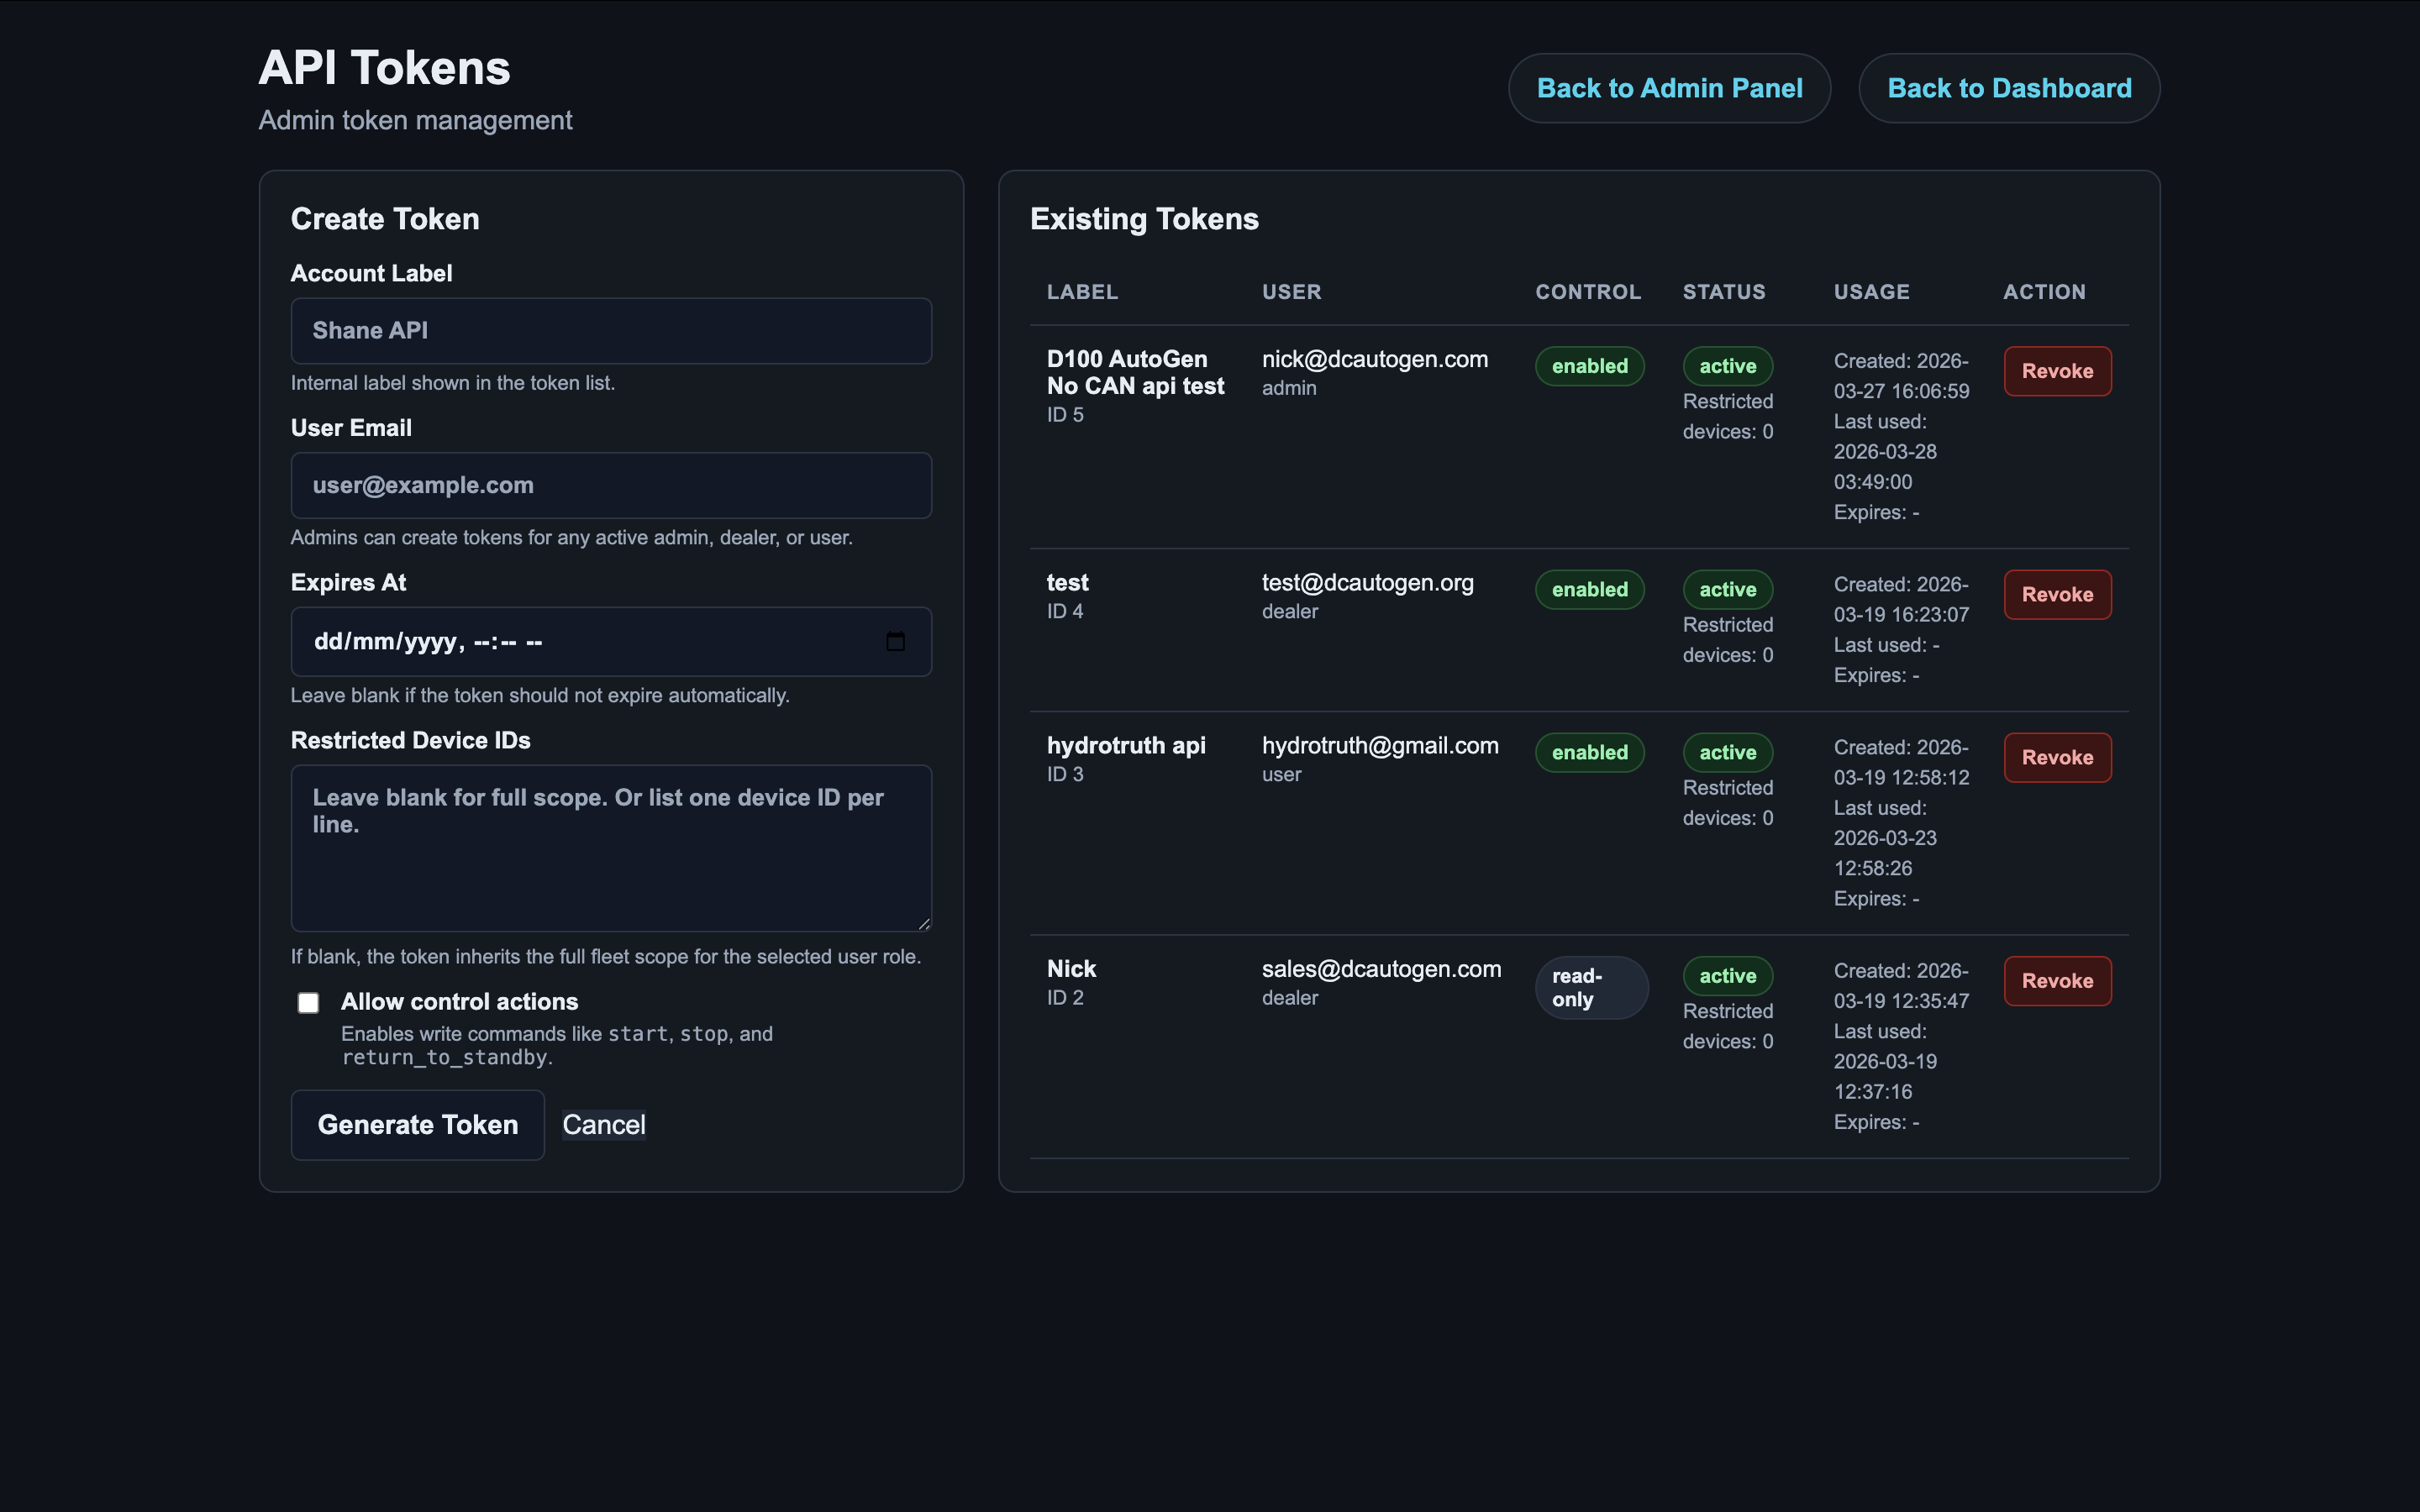
- Read-only: dashboards, reporting, monitoring
- Control-enabled: only when the integration must send commands or supported settings writes
Dealer Workflow
Roll out a tested firmware
- Validate on one device first.
- Open the correct firmware console.
- Choose correct engine and variant.
- Deploy to
my_fleet. - Monitor versions and online return in Fleet Console.
Issue customer API access
- Choose the correct user account.
- Decide read-only or control-enabled deliberately.
- Restrict devices if needed.
- Create the token and hand it off securely.